
How to Fill Gaps in Hardwood Floors
Discovering gaps in your beautiful hardwood floors can be alarming. Those unsightly spaces between the boards can detract from the overall aesthetic of your home and may even raise concerns about the floor’s structural integrity.
But don’t worry! At LV Hardwood Flooring in Toronto, we understand the intricacies of hardwood flooring. Gaps are a common issue, and in many cases, they can be addressed effectively with the right techniques and materials.
Whether you’re a DIY enthusiast or prefer to leave it to the professionals, this blog post will guide you through the process of filling gaps in your hardwood floors, restoring their beauty and ensuring their longevity.
Related Article: Is It Better to Install Hardwood Floors in the Winter or Summer?
Why Do Gaps Appear in Hardwood Floors?
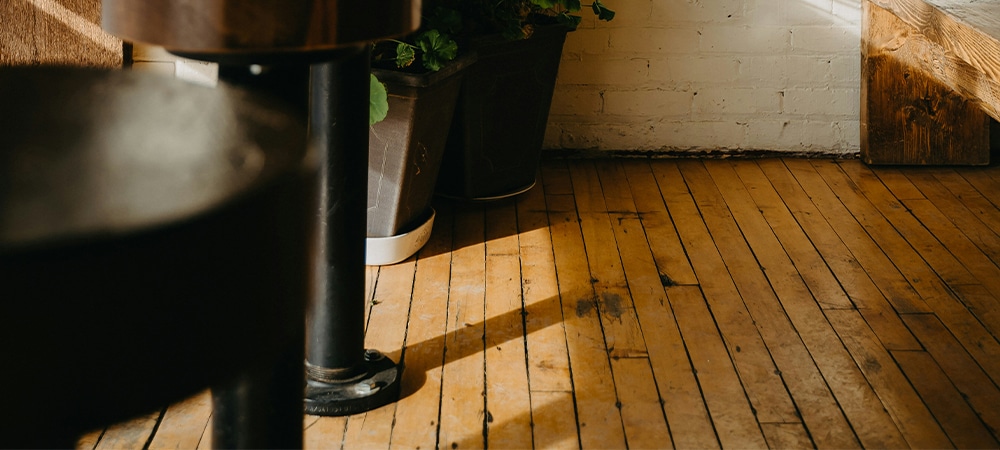
Hardwood floors are a natural product, and like all things in nature, they are subject to change. One of the most common changes you might notice is the appearance of gaps between the floorboards.
Natural Causes
Wood is hygroscopic, meaning it absorbs and releases moisture in response to changes in humidity.
Expansion and Contraction: During humid months, wood absorbs moisture and expands. In drier months, it releases moisture and contracts. This natural expansion and contraction cycle can cause gaps to appear and disappear between the boards.
Other Contributing Factors
While humidity is the primary culprit, other factors can contribute to gaps in hardwood floors:
- Improper installation
- Subfloor issues
- Wood quality
- Excessive moisture
Related Article: What Should I Know About Installing Hardwood Floors in a Humid Climate?
Assessing the Gaps
Before you grab the wood filler, it’s important to take a closer look at those gaps in your hardwood floor. A proper assessment will help you determine the best course of action.
Size Matters
- Minor Gaps: These are small, hairline gaps that are common in hardwood floors, especially during drier seasons. They usually don’t pose a structural concern and can often be addressed with simple filling techniques.
- Larger Gaps: Wider gaps, particularly those that are persistent or appear suddenly, may indicate a more serious issue, such as subfloor problems or improper installation. These may require more extensive repairs or even professional intervention.
Location
Where the gaps appear can also provide clues about their cause:
- Gaps throughout the floor: This often indicates seasonal expansion and contraction due to humidity changes.
- Gaps concentrated in one area: This might suggest a localized issue, such as a subfloor problem or water damage.
- Gaps near doorways or windows: These areas are more susceptible to temperature fluctuations and moisture, which can contribute to gaps.
By carefully assessing the size, location, and pattern of the gaps, you can gain a better understanding of their cause and choose the most appropriate filling method.
Methods for Filling Gaps in Hardwood Floors
When it comes to filling those pesky gaps, you have several options, each with its advantages and best uses.
Wood Filler
This is a go-to solution for small to medium-sized gaps. Wood filler comes in a variety of colours to match your floor and is available in two main types:
- Water-based: Easier to clean up and better for indoor use due to lower VOCs (volatile organic compounds).
- Solvent-based: More durable and dries faster, but has a stronger odour.
Application:
- Clean the gap thoroughly to remove dust and debris.
- Choose a filler that closely matches your floor’s colour.
- Apply the filler with a putty knife, overfilling the gap slightly.
- Allow the filler to dry completely according to the manufacturer’s instructions.
- Sand the area smooth, blending the filler with the surrounding floor.
- If necessary, stain and seal the area to match the rest of the floor.
Wood Strips
For larger gaps (over ¼ inch wide), wood strips offer a more substantial solution.
- Matching is Key: Choose strips of wood that match your existing floor as closely as possible in terms of species, colour, and grain pattern.
Application:
- Measure and cut the wood strips to fit snugly within the gap.
- Apply wood glue to the sides of the strips and insert them into the gap.
- Gently tap the strips into place, ensuring they are level with the floor surface.
- Allow the glue to dry completely.
- Sand, stain, and seal the area to blend with the surrounding floor.
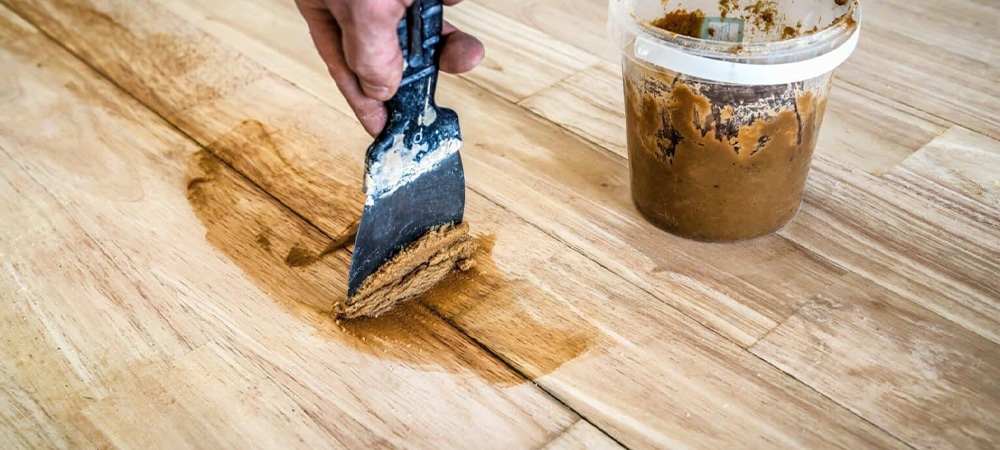
Sawdust and Resin Filler
This method creates a custom filler that perfectly matches your floor’s colour and grain.
- DIY Solution: Collect fine sawdust from sanding your floor (or use sawdust from a matching wood species). Mix it with a resin adhesive to create a paste.
Application:
- Clean the gap thoroughly.
- Apply the sawdust and resin mixture to the gap, overfilling slightly.
- Allow the filler to dry completely.
- Sand the area smooth, blending it with the surrounding floor.
- Seal the area to protect it and enhance the colour match.
This method is excellent for achieving an almost invisible repair, especially in high-traffic areas where colour matching is crucial.
Step-by-Step Guide to Filling Gaps
Ready to tackle those gaps yourself? Here’s a step-by-step guide to help you achieve a professional-looking repair:
1. Prepare the Floor
- Clean: Thoroughly clean the area around the gaps to remove dust, dirt, and debris. Use a vacuum or a damp cloth to ensure a clean surface for the filler to adhere to.
- Sand (if necessary): If the gaps are particularly deep or uneven, you may need to lightly sand the edges of the boards to create a smooth surface for the filler. Use fine-grit sandpaper and be careful not to damage the surrounding floor.
2. Choose the Appropriate Filler
- Wood Filler: For most minor gaps, a colour-matched wood filler is the easiest and most convenient option. Choose a water-based filler for easier cleanup and lower VOCs, or a solvent-based filler for faster drying and greater durability.
- Wood Strips: For larger gaps (over ¼ inch), consider using wood strips for a more substantial and aesthetically pleasing repair. Ensure the strips match the existing floor in terms of wood species and grain pattern.
- Sawdust and Resin: For a seamless colour match, especially in high-traffic areas, consider creating a custom filler using fine sawdust from your floor and resin adhesive.
3. Apply the Filler
- Wood Filler: Use a putty knife to apply the filler, overfilling the gap slightly. Smooth the filler with the putty knife, removing any excess.
- Wood Strips: Apply wood glue to the sides of the strips and insert them into the gap. Gently tap them into place, ensuring they are flush with the floor surface.
- Sawdust and Resin: Apply the mixture to the gap with a putty knife, overfilling slightly. Smooth the surface and remove any excess.
4. Finish the Repair
- Drying Time: Allow the filler to dry completely according to the manufacturer’s instructions.
- Sanding: Once dry, use fine-grit sandpaper to sand the filled area smoothly, blending it seamlessly with the surrounding floor.
- Staining (if necessary): If the filler doesn’t perfectly match the floor colour, you may need to apply a stain to blend it in. Test the stain on a hidden area first to ensure a good match.
- Sealing: Apply a sealant to the repaired area to protect it from moisture and wear and tear. Choose a sealant that is compatible with your floor’s finish.
By following these steps carefully, you can effectively fill gaps in your hardwood floors, restoring their beauty and ensuring their longevity.
Related Article: How to Care for Your Floors: Essential Tips and Techniques
Achieve Flawless Hardwood Floors
Whether you’re a DIY enthusiast ready to tackle the repair yourself or prefer the expertise of professionals, remember that those gaps don’t have to be permanent. Take action to address them and enjoy the enduring beauty and warmth that hardwood floors bring to your home.
For expert advice and a wide selection of high-quality hardwood flooring options, contact or visit LV Hardwood Flooring in Toronto. We’re here to help you keep your floors looking their best for years to come.
