How to Cut Laminate Flooring
What are the chances that the number of laminate floorboards you ordered will be the exact number that’ll fit your apartment? Surely, the probability of you getting the right number of planks with the correct dimensions to go straight on your floors is ultra-low. You have a better chance of finding tickets to the Superbowl three days after they’re sold out.
It’s pretty tricky, if not impossible, to get the perfect measurement for your laminate flooring without needing to cut it. Admittedly, several people consider laminate flooring to be one of the easiest to install. So, it’s not surprising that most people go the DIY route when fixing laminate flooring in their apartments. However, that doesn’t mean the cutting process is equally simple.
Don’t for a moment think you can cut laminate flooring as easily as you slice through a chunk of cake. That may sound a bit exaggerated, but it drives the point that you can’t simply start cutting laminate without adequate knowledge of the process. You’ll make a mess of it if you don’t know how to properly cut laminate floorings. So, let’s not make a mess of things, just follow this guide to cutting laminate flooring and do it like a pro!
The Tools You Need for Cutting Laminate Flooring
The tools may only be as good as the user. However, even the most skillful user will appreciate having the appropriate tools for a task. As such, you can’t underestimate the importance of having the right equipment when you cut laminate floorings. Given the intricacy of the cutting process, having the right equipment will do you a world of good.
Then again, the tools you choose will either assist you in getting top-quality cuts quickly or make the work more challenging for you. So, below is a list of the appropriate equipment you’ll need to have an easy time cutting laminate flooring.
Measuring Tools
The whole point of cutting the laminate planks is to get the appropriate dimensions to fit your apartment floors. But you can’t get the desired dimensions without proper measurements. This is where the tape measure, profile gauge and combination square come in.
Tape Measure: You’ll be doing a lot of measuring, and the tape measure is ideal for the job. It’s long, flexible and perfect for large measurements. Ensure to get a tape measure that pulls out and returns smoothly without getting stuck to avoid inconveniences.
Profile Gauge: This tool is helpful for cutting tricky shapes. So, it’s useful if you have to cut for bends and corners. You can use it to create the exact profile you need, simply mark it on the piece, and you’re good.
Combination Square: Most people use a T-square or try square as an alternative for this tool. That’s fine; they do an excellent job too. However, the combination square enables you to mark parallel lines faster when cutting across the board’s width.
Marking Tools
Pencil or Pen: You’ll have to mark points and trace lines, right? We recommend a fine tip for more precise markings.
Cutting Tools
The next course of action is cutting after measuring and marking out points on the planks. Below are some of the tools you may employ for that task.
Laminate Floor Cutter: This is a handy tool for making lengthwise cuts on the laminate planks. The name already suggests that the manufacturers specifically designed the tool for cutting laminate flooring. So, professionals use it to cut laminate floorboards to length, and it can be essential to how fast you’ll complete your task.
The laminate floor cutter has a tough blade with a long handle which you’ll use to exert a downward force on the planks. So, you simply chop it up with this tool rather than sawing the laminate. There is no sawdust, no noise; all you get is a clean, perfect cut.
Fortunately, you can get a cutter for as low as $70 on the cheap models. However, you get what you pay for when it comes to laminate cutters. A base model may only get you through a kitchen and bedroom before the blade brackets come out or the handle snaps. So, it’s advisable to get at least an intermediate-grade cutter, which goes for around $220. Such a model will serve you better for longer.
Jigsaw: The jigsaw cutter is more suited to cutting round shapes, e.g. pipe or post holes. But that doesn’t mean you can’t use it to make lengthwise cuts. Regardless, you want to go for jigsaw blades that are specifically designed for laminate boards. These blades cut on the downward stroke quickly and easily.
We recommend that you plan to go through multiple blades if you’re cutting for the entire apartment. A good pack of jigsaw blades will cost between $5-$8.
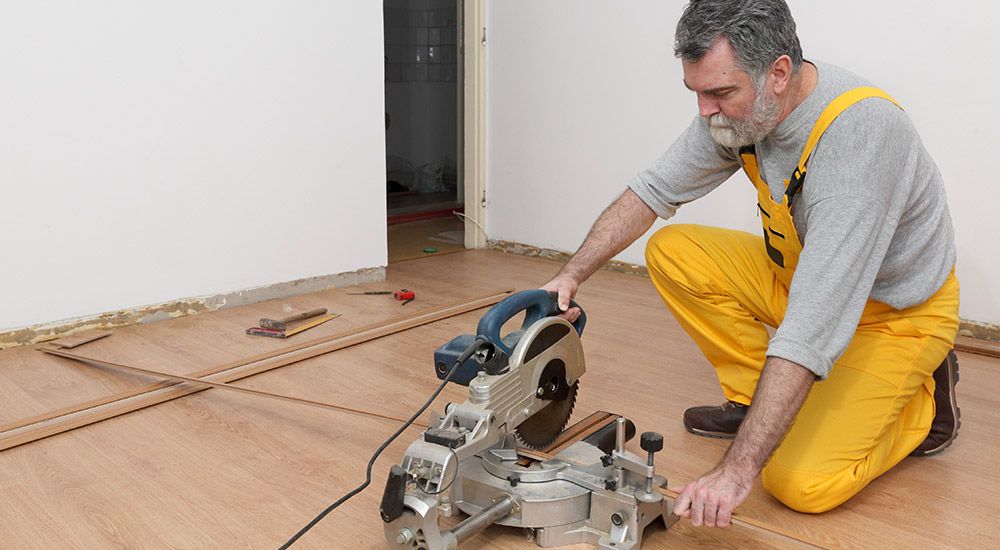
Circular Saw: A circular saw does the same job as the jigsaw and the laminate floor cutter. The only difference is that the circular saw relies on electricity for power and has a circular blade. To use it, you’ll need to hold the piece down firmly and push the blade on the marked points. Again, be careful to keep your appendages away from the blade of the saw.
Mitre/Coping Saw: This type of saw is very similar to the circular saw, and it’s perfect for making fine cuts. You can use a coping saw to make delicate cuts for thin pieces of laminate. However, it may be a bit tricky to install and use. Ensure the blade’s teeth are pointing towards the handle when installing it.
Note that you don’t need to use all these cutting tools when installing laminate flooring in your apartment. You should be able to complete the job using one or two of the mentioned cutting devices. That said, we recommend going for carbide-tipped blades if you’re using either a circular saw, mitre saw, or table saw. This is because standard blades tend to dull quickly when you use them on laminate floors.
Safety Materials
Don’t forget your safety gloves and goggles when you set out for the task. Neglecting to put these items on means you’re needlessly exposing yourself to dangers and risks.
Related Article: Can You Mop Laminate Flooring?
Best Way to Cut Laminate Flooring
Now that you have all the tools you need, it’s time to do some cutting. To that end, we will consider the step-by-step to cutting laminate flooring. Don’t worry; this guide will cover all the different types of cuts you may want to make. And if you’re not sure of your skills, you can create one or two false cuts for practice before getting into the real deal. Alright, let’s get into it!
Cutting Laminate to Length
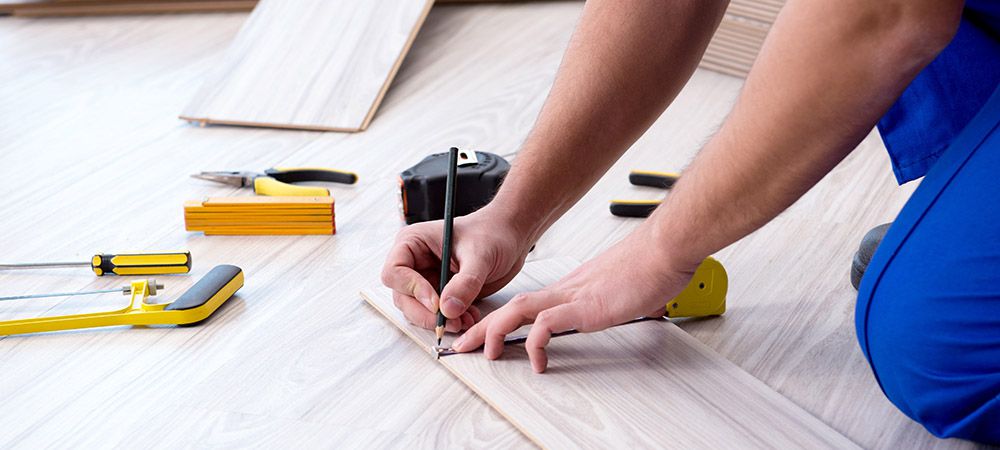
- The first thing you need to do is measure the required length with the measuring tape and mark it with a pencil or pen.
- Next, draw a line across to indicate the part you want to cut.
- Secure the board under the cutting tool and cut the laminate flooring along the drawn line.
- Wipe off the markings with a damp cloth.
Ensure to flip the laminate flooring planks upside down so you can cut the backside. You’ll avoid chipping and marking the surface of the flooring this way. Also, try to do the work as calmly as possible, don’t rush. The most important thing is to follow the cut line. So, take your time with it and use guides if you must.
Cutting the Laminate to Width
No matter how well you plan out the flooring for your home, there will still be spaces you’ll need to fit with thin planks. For example, you need to cut to width when cutting the last board before a wall. Professionals may also refer to it as a rip cut. And this is when you want to use a circular saw instead of a mitre saw.
Before making this cut, keep in mind that laminate flooring requires about ¼” for expansion space. This is to keep the floor from buckling when there are changes in temperature and humidity. With that note, do the following;
- Measure out the required width on the laminate plank. Do this by placing a full laminate on the second-to-last piece and snuggling it to the wall. Then, use a pencil to mark out the overlapping parts.
- Make a cutting guide of the same width as the overlap out of laminate scrap. Add ¼” to the guide to account for the expansion space. So you have the overlapping size plus ¼”.
- Next, put the piece of laminate against the wall and place the guide on top of it, also against the wall.
- Mark out the cutting part along the width of the piece by running your pen across the outside of the guide. Ensure to cut along the board’s waste side, i.e., the scrap piece that’ll be useless after cutting.
- Secure the board under the cutting tool and cut along the line you drew.
- Wipe off the markings with a damp cloth.
Cutting the Laminate for Pipe Holes and Around Obstacles
Ideally, you should keep the floors wherever you decide to install laminate flooring free of obstructions. But there are places where these obstacles are inevitable, most especially the kitchen area. You need to put more attention into planning for these areas. Follow the steps below in such cases.
- When cutting for pipes, measure the width and length to the pipe’s center
- Take the laminate piece and mark where you intend for the center of the pipe
- Use a jigsaw or hole saw to cut an opening for the pipe around the point you marked. Make sure the hole’s diameter is ½” larger than the diameter of the pipe. Try not to go too large, or you may need to fill up the extra space with a grommet or gasket.
- Next, divide the laminate piece into two by cutting across its width through the center of the hole.
- You’ll fit the pieces around the pipe when installing the floors. Use suitable glue to secure the pieces together during installation.
- You’ll need a profile gauge when cutting around obstacles and odd shapes.
- Use the profile gauge to replicate the odd shape you’re trying to cut out.
- Next, place the profile gauge on the piece of laminate and mark out the shape with your pen.
- Cut out the shape along the waste side with the jigsaw.
- Wipe off the markings with a damp cloth.
Tips to Cutting and Installing Laminate Flooring – Best Practices
Having the right equipment and following the step-by-step guide is essential when cutting laminate flooring. However, there are specific tips you need to pay attention to when cutting and installing laminate flooring. They’ll make your work easier and prevent wastage.
Buy A Little More Than You Need
Regardless of your best efforts in a DIY flooring project, you’ll most probably make mistakes and waste some of the resources. Therefore, to protect against process breakdown or delays, it’s advisable to get a few more materials than you need. Ideally, you should buy 5% to 10% excess of the items required to complete the project.
The excess materials will account for waste and mistakes. Not only that, even if you’re somehow able to complete the project without errors, you can keep the spare boards for future repairs. Plus, you may be able to get the items cheaper or at a good discount when you buy more.
Let the Planks Acclimate Before Cutting
Letting the planks acclimate means allowing the laminate floors to adjust to the temperature and humidity of the environment. You’ll achieve this by bringing your laminate flooring inside the apartment for a couple of days before starting the project. This will give the floorboards sufficient time to get accustomed to the environment.
Why should you let the floors acclimate? Laminate floors are very flexible and respond to slight changes in the environment. So, a change in the temperature or humidity of the environment may cause it to expand or contract.
That said, your home temperature and humidity may be different from those of the warehouse where the vendors formally stored the planks. So you need to let it expand or contract as the environmental condition in your home will allow it before installation.
Not allowing the planks to acclimate to the environment may lead to problems later on. For example, you don’t want to install laminate planks previously stored in a humid location in an air-conditioned room immediately. If you do that, the laminate flooring will begin the contract the moment you install them, and the piece may pull apart at the end. If you reverse the condition, it may lead to expansion of the panels and buckling of the floor.
Get Accurate Measurement
“Measure twice, cut once.” Let that adage be your mantra as you set out to cut the laminate flooring. We can’t overstate the importance of getting your dimensions right when cutting. The correct measurement can make the difference between a perfect floor and a manageable one.
The accuracy of your cut will first depend on the correctness of your measurement and the precision of your markings. We recommend measuring up the space and the planks you have then planning the correct size. After this, measure and repeat the process.
You can’t uncut a plank, so you need to make sure you have the correct dimensions before slicing it up. The best way to avoid wastage is always to ensure you have the perfect measurement. Make good use of all the measuring and marking tools available to you. Don’t do guesswork; measure everything, even the tiniest cuts.
Use Cutting Templates
Cutting templates increase your accuracy and precision when cutting. So, one of the best ways to minimize wastage is to use models. You can make templates using cardboard or scrap laminate materials. However, we recommend cardboards as they’re easier to work with and less expensive.
Simply take the material you want to use in creating the template and trace out the area you need to cut. Then cut the material into the shape you intend to make. Tape or use a temporary adhesive to glue the template to the top of the laminate. Then cut out the profile on the laminate with a jigsaw. The final product should fit the point you want to install it in perfectly if you did everything correctly.
Related Article: How to Lay Laminate Flooring
Final Thoughts
Laminate is a very durable and fine option for your interior floors. However, you need to be careful when cutting it. Using power tools can cause it to chip and scratch. So, you want to take all the reasonable care you can as you cut through your laminate flooring. Take your time, don’t rush your laminate installation process, or you may end up wasting resources and effort.
You’ll find cutting laminate flooring to be relatively straightforward if you follow the guide we provided above. But if the task is proving to be challenging for you, we can help you with that. Check out our online store at LV Flooring for easy-to-cut laminate flooring designs.