10 Steps for Installing Laminate Flooring
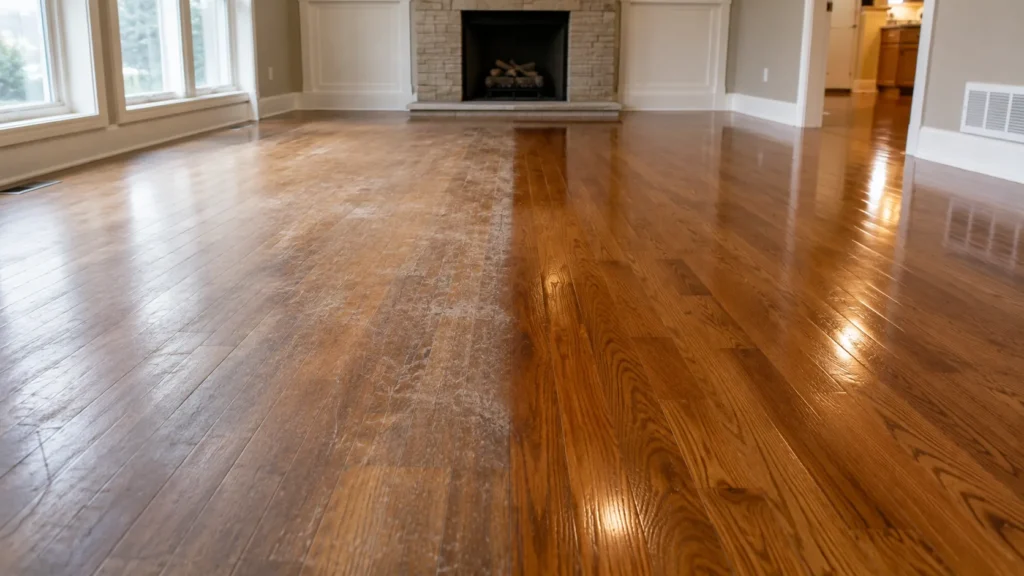
Laminate floor is a composite flooring type made up of wood base particleboard, a topping of an image layer, and a translucent wear layer. Installing laminate flooring is best for places with low moisture expectancy. So it’s little wonder why this type of flooring is highly sought-after for homes.
Laminate flooring was an invention of the Swedish company Perstorp in 1977. It was an idea born from subjecting waste wood to intense heat, high pressure, and strong binding chemicals. It went on to become a popular flooring option that other manufacturers like Mannington, Armstrong and Shaw invested in.
Funny enough, the idea first hit a gridlock of criticism and skepticism. However, realizing the beauty, affordability, and durability of laminate floorings eventually made it the choice for homes and builders.
One thing that especially made it stand out was its simulation of the natural wood outlook. As a result, the popularity of laminate planks now transcends old times and remains a major flooring investment for both flooring manufacturers and homeowners.
Are you looking to move to a new apartment and want to install laminate flooring? Or do you want to change your current home’s flooring to laminate flooring? Regardless, in this article, you’ll be learning ten feasible steps of DIY laminate flooring installation.
First, let’s visit tips to identify quality laminate floor planks before checking out. Let’s go!
How to Recognize Good Laminate Flooring: What to Expect
The ease of installing laminate floors is one of its high-end features. Its installation also gives the option of using the floating-floor method. Unlike other floorings, laminate flooring uses thin rubber underlayment to fasten to the subfloor. This feature saves you the stress and danger of nails and mess of glues when either serves as a fastener.
The installation process is so simple that you can do it yourself by following simple procedures. In 4-5 hours, you’re done with a regular ten by 12 ft room. You mainly need to snap in the planks for installation. In no time, your furniture and other belongings will be sitting pretty on the luxury face of your laminate floor.
Here’s a highlight of the advantages of laminate floors:
- Made to be highly durable
- Affordable and Seamless installation
- Liquid and Scratch resistant
- Beautiful and easily cleanable surface.
- Real outlook
You may only be looking for the best way to install laminate flooring. But it’ll be in vain if you have that know-how, but you don’t buy good quality laminate flooring planks. The following are things to look out for when you want to make that purchase.
1. The Laminate Thickness
Laminate planks are usually very durable. But, you need to know the thickness to see if it’s best for your home. Anything between 7 mm to 12 mm is okay.
2. Wear Layer Thickness
This exterior is the part where you, your family, and your friends will walk on. So you need to determine its resilience. NK 23 should suffice for anywhere in a domestic apartment.
3. Aesthetics
Laminate planks have a woody look with decorative patterns. You’ll notice that on purchase.
4. Moisture Resistant
It must be moisture resistant. You can tell it’s moisture resistant if the joints and edges have impregnations.

5. Climate Compatibility
Laminate planks can cause different health effects. So their seals need to be perfectly done. Any laminate with loose sealing is not advisable for purchase.
10 Steps to Installing Laminate Flooring
Now let’s delve into the ten steps on how to install laminate flooring.
Related Article: How to Cut Laminate Flooring
1. Space Preparation
Every aesthetic endeavour requires a level of planning. Unsurprisingly, installing laminate flooring is not left out. Usually, the size of your space will determine how you prepare it for your laminate floor installation.
For example, flooring in a small or medium-size room may temporarily require moving out all significant belongings. However, flooring larger spaces may only require you to move your belongings to a corner of the room, depending on which part you’re flooring first.
Furthermore, inspect the room to know if it has quarter-round shoe mould lining along the edges of the baseboard moulding. You may need to detach it before installing laminate flooring if it does. Meanwhile, you don’t need to remove the baseboard moulding.
Continue the preparation process by prying up the shoe moulding with a slim pry bar. But cautiously do this, so you don’t damage the shoe moulding. This caution is because you’ll have to reinstall the shoe moulding after installing the laminate floor. You may be asking why you need to replace it. Here’s why:
Humidity will make laminate flooring expand. Therefore, you must allow an expansion between the baseboard moulding and the flooring. The gap is usually something between ¼ – ⅜ inches wide. This gap is what the shoe moulding covers while giving seamless movement to plastic-laminate planks.
Please Note: Ensure you nail the shoe moulding directly into the baseboard. Mistakenly nailing it to the flooring can damage the latter.
Truthfully, you can overlay laminate planks on some forms of worn flooring. But it’s not always advisable. Instead, it’s best to remove the initial flooring to work directly on the main floor underneath.
2. Getting Tools
You need your work tools ready when about installing laminate flooring. So firstly, ensure that all your tools are complete and in good condition. Also, try to keep your tools together in the room you want to floor.
Tools you will most likely need through the laminate flooring installation include the following:
- Jigsaw Kit
- Laminate Flooring Cutter
- Universal Tapping
- Impact Driver Kit
- Hive Tool
- Hive Tool
- Universal Tapping
- Jigsaw Kit
- Cordless Miter Saw
- Cordless Miter Saw
- Portable Circular Saw
- Portable Circular Saw
- Laminate Flooring Cutter
- Impact Driver Kit
- Adjustable T-Square
- Adjustable T-Square
3. Envision and Draw out the Pattern
You need to pay keen attention to the pattern details as you work. For example, you’ll want to ensure that the seams are in the proper position.
Thus, carefully measure your room and sketch out a little pattern on a piece of scrap paper. Meanwhile, the sketch/graph may change based on the size and shape of your room. But it’ll help you to reduce the amount of flooring you waste with cuts. Think about using the cut ends to start another row then further along in the pattern.
4. Trimming Doorways
One of the things you want with your floor installation is an impeccable installation. With DIY laminate flooring installation, you’ll need to be very attentive to achieve this.
You need the laminate planks to fit perfectly around doorways for a neat installation. And the laminate planks will only fit when you trim the side jambs and door casings. The perfect trim will allow the laminate planks to slip easily beneath.
Usually, this trimming exercise can seem daunting and tiring. But it’ll be a worthy work if you get it done and right. Moreover, it’ll save you the stress of forcefully notching the flooring around doorways.
To trim, first lay a piece of the underlayment rubber before the casing. Afterwards, put a plastic-laminate piece on top. This setup will guide the trimming process and ensure you’re trimming out the correct proportion of wood.
Furthermore, saw over the flooring top and through the casing with a handsaw or similar cutting tool. Similarly, trim all the side jambs and casings and clean up your surroundings of dirt. You’re significantly one step closer to completely installing laminate flooring.
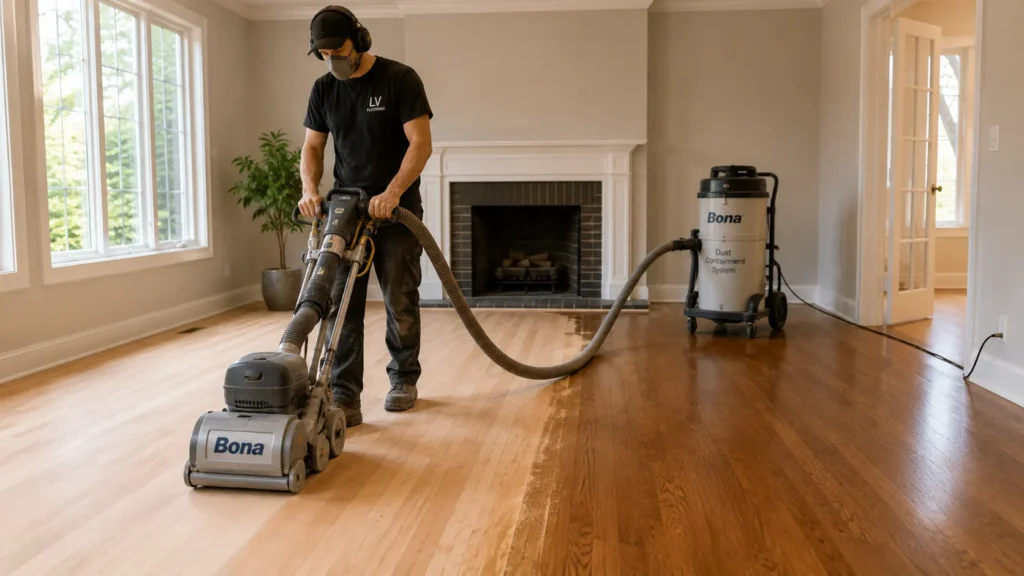
5. Subfloor Dressing
Preparing your subfloor is a crucial step in the laminate flooring installation tips. Removing your old flooring gives you direct contact with your subfloor. This bare access would help detect and avoid annoying sounds that may have been disturbing if the new floor installation was done over the old one.
Carefully and steadily walk around the whole room to listen for possible squeaks. If you catch any, drive 2-inch drywall screws into each point you hear a squeak. Ensure the screws are driven into a floor joist using a cordless impact driver.
In addition, you can fill any wide cracks, holes, or hollows in the subfloor with a levelling compound or wood putty.
6. Underlayment Roll Out
The next step in installing laminate flooring is rolling out underlayment. Usually, there’s a thin rubber that supports laminate flooring. This thin rubber provides a form of moisture and serves as a cushion underneath the planks of plastic laminate. In addition, it ensures the cancellation of squeaky sounds.
You should know something after getting where to buy laminate flooring planks. First, try to get and use the underlayment suggestions of your flooring manufacturer. We implore you to do this in order not to buy one that won’t fit well with your flooring. Additionally, these flooring underlayments come in varying lengths between 3-5-foot wide.
After getting underlayments, roll them out to each wall point. Then use a utility knife to trim them to appropriate lengths. You can use a drywall T-square (4-foot-long) for the cutting. This tool makes it easy to cut the foam into perfect length and shape.
Pick two cut underlayment lengths and stay one to the other. Here, be careful not to let the edges overlap.
Also, don’t tape or staple the underlayment onto the subfloor. Instead, simply place the strip edges against each other and conceal their seams with masking tapes. The concealing tapes ensure that the underlayments don’t shift from a position.
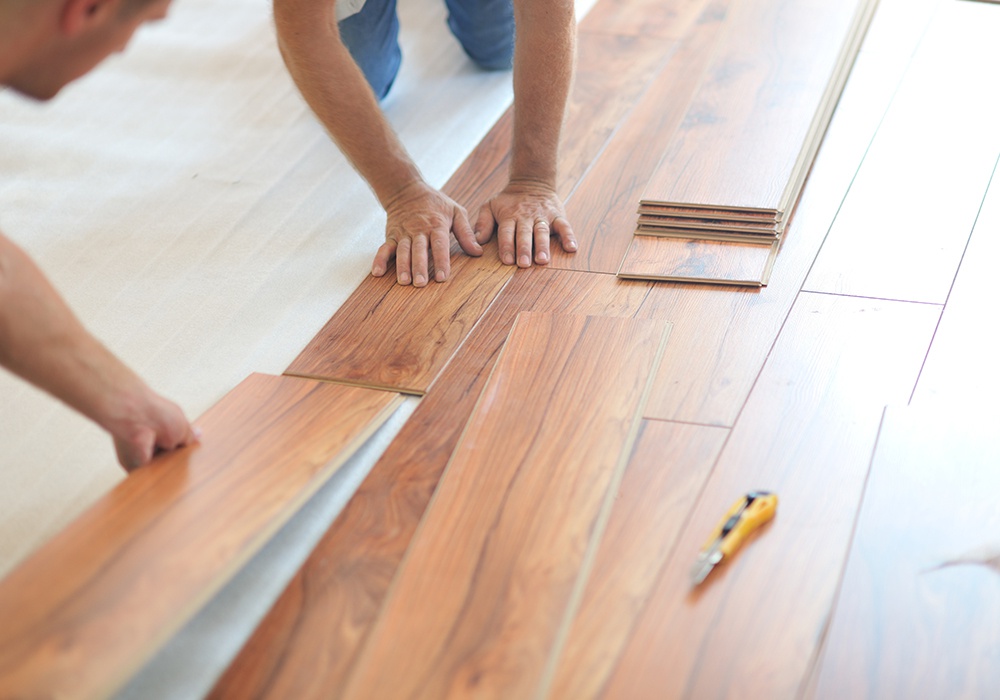
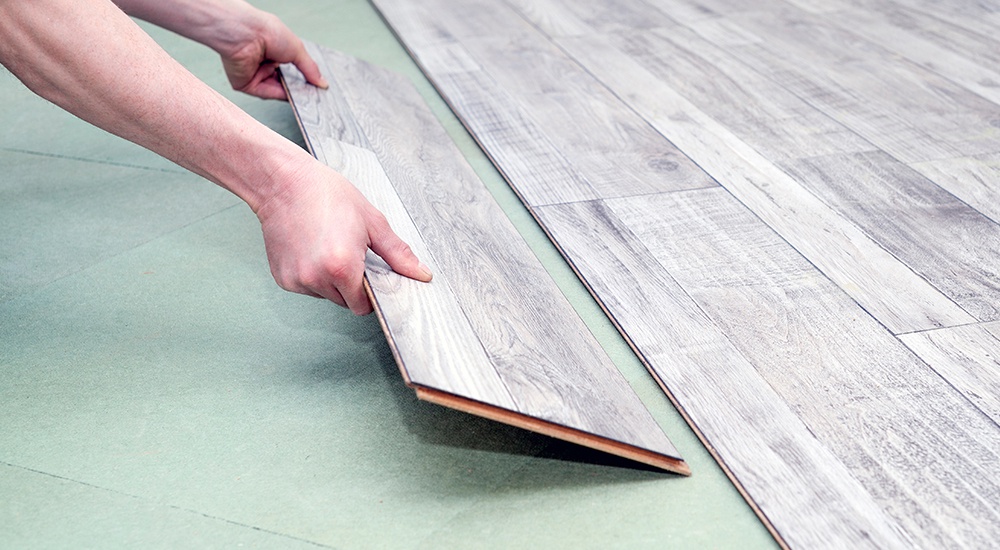
7. First Row Installation of Flooring
Next in the guide to installing laminate flooring is knowing your first and last row measurements. You need to have a precise knowledge of the flooring plank width for those rows. Meanwhile, you may be asking why you need such measurements.
These measurements are necessary for the following reasons:
- First, the flooring will look deliberately and perfectly done.
- The middle balance will be easy to achieve once the first and last rows are well done.
Also, both rows have to be precisely or over the width of a full plank. And you can get the calculations like this:
- Measure room width and subtract ¾ inch for expansion possibility. (The gap along the walls should be ¾ inch).
- Divide room width by a full plank width. You’ll get the number of full-width planks you need to cover the floor. Also, you’ll be able to determine the fractional width of the remaining planks.
- You need to know if the remaining width is less than half a plank.
- Furthermore, you’ll need to use a circular or table saw to split the flooring in the first row. This rip will ensure that the last row is at least half of a full plank.
Here’s an example for more straightforward clarification on the above explanation:
Let’s assume your room is 123 inches wide and the width of the laminate planks is 7½ inches. Minus 3/4 inch from 123 and divide the result by 7½. That should leave you with 16.3.
The above shows you’ll be needing nothing less than 16 planks for the room coverage. In addition, you’ll need 3/10ths of one full plank. Thus, the last row would be 2-1/4 inches if you start the first row using complete planks.
Now, it’ll be good to split 2 ⅝ inches off the first row to make the first and last rows 4 ⅞ inches wide.
When setting down the first row of planks, be sure the edge with the tongue faces the wall, and the grooved edge faces out into the room. Lastly, ensure the first row of planks has their edge tongues facing the wall. Meanwhile, the furrowed edge should point out into the room.
8. Usage of Tapping Block
The tongue-and-groove joints of laminate planks usually fit together. Sometimes they even snap together. It is, however, advisable that you seal those joints using a tapping block and hammer.
When hammering, you need to be very careful. Avoid hammering straight on the plank edge, or you’ll damage it. And that’ll make it almost impossible to install the next plank. In addition, ensure you use the tapping blocks when marrying the plank ends to seal up their joints.
Additionally, it’s possible to make your tapping blocks yourself. For example, you can use scraps of hardwood. But you have an assurance of better output when you use a tapping block purposely made for laminate floors.
These special tapping blocks are products of extra-resilient plastic that stand the rigours of the installation. You can easily get them from where you buy laminate flooring planks.
9. Plank Splitting
The next step in guiding you on how to install laminate flooring is cutting your planks. Almost any kind of carpentry sawing equipment can work for this purpose. Some of them include the following:
- Power mitre saw
- Portable circular saw
- Jigsaw
- Handsaw
All of these tools can crosscut your laminate planks to chosen lengths. Sometimes, your cuts may not be hundred percent perfect. But you needn’t worry because the shoe moulding will make it unnoticeable.
Plank sawing can generate a generous amount of fine dust during cutting. This dust results from the makeup of the flooring material – medium-density fiberboard (MDF). No one wants their space filled with such an amount of dust. Therefore, it’ll help if you can rent or purchase a laminate-flooring cutter.
The cutter has a long handle that’ll give you the needed advantage to easily and swiftly cut through planks without much dust generation. Also, avoiding dust means working inside your room and not having dense cleaning to do afterward.
Also, make sure all your planks’ edges are set against the wall. They shouldn’t be at the center of the floor. Also, never cut a plank as short as 11 inches. 12 inches should be the barest minimum.
10. Last Row Installation
The last row installation is the final step on the list of pro tips to installing laminate flooring. Installing the last row of flooring is easier than you can imagine. You just need to snap together all the planks and position them against the next to last row.
Ensure the tongue-and-groove joints overlay hard on the last row. Stick a pry bar between the baseboard and the previous row if need be. In addition, slip a stretch of plywoods just behind the pry bar to secure the baseboard and apply pressure to force the joints.
Related Article: How to Lay Laminate Flooring
Final Thoughts
Laminate floors are a beauty to have in your home. Installing laminate flooring will not only have you revelling in the beauty of the end product. But you’ll be creating an impression of your exotic aesthetic sense in your visitors.
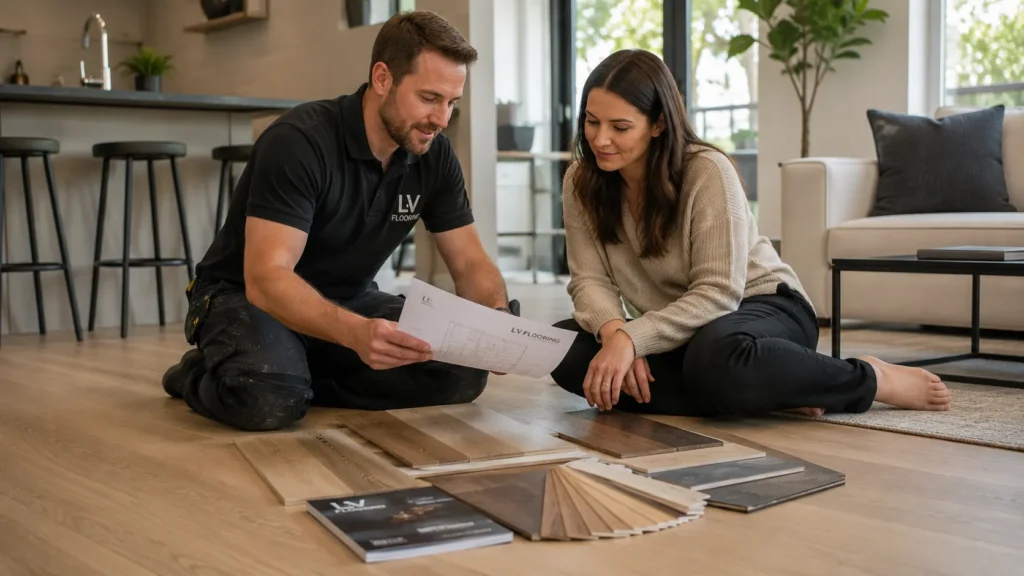
Also, its other advantages like acoustic quality, easy maintenance, and affordability make it a perfect choice. Also, you may choose to follow the DIY steps given in this article to install your laminate floor yourself. Adhering strictly to the steps means you’re likely to have a neat and professional output.
In addition, your installation will come out best when you use quality laminate flooring products. Fortunately, our online store at LV Flooring includes top-quality laminate flooring planks in different attractive designs.
Look through our online store today!