Can Floating Vinyl Flooring Go Under a Built-In Mudroom Bench?
Editorial date: October 15, 2026, 9:00 a.m. America/Toronto. First published: October 23, 2026.
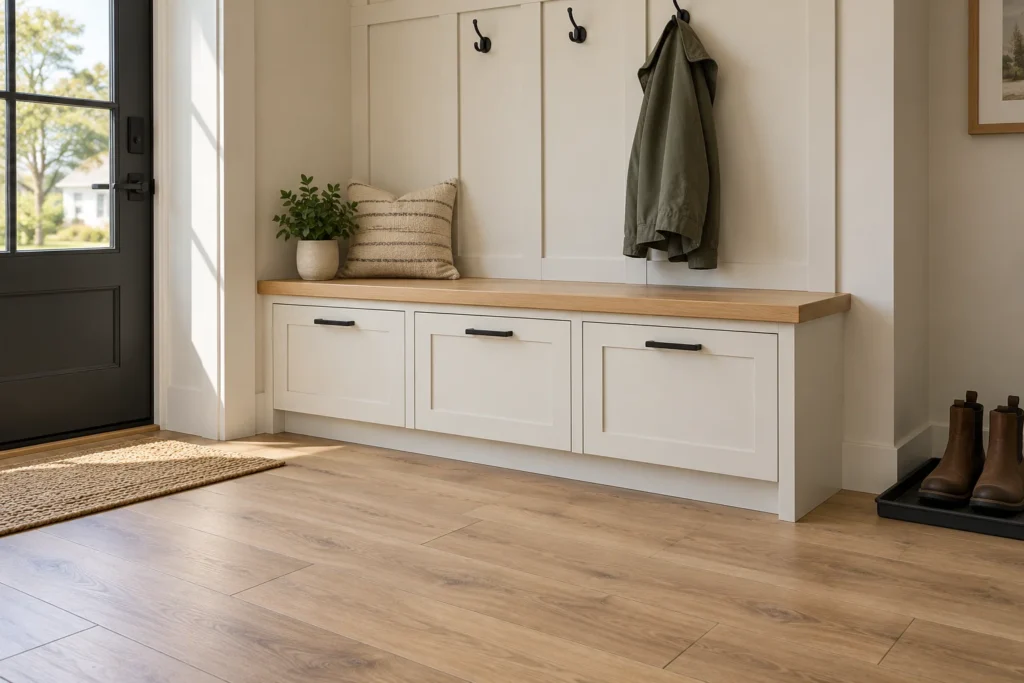
Do not assume floating vinyl can run underneath a built-in mudroom bench. The answer depends on the exact flooring product and on how the bench is supported and secured. A permanent storage unit resting on the floor is a different installation question from a movable bench on legs.
Before either trade starts, match the bench drawing to the floor manufacturer’s fixture instructions. Some rigid-core systems require permanent fixtures to be installed first, with the floor fitted around them. Special manufacturer-approved methods exist, but they are not permission to pin any floating floor beneath cabinetry.
First, establish what “built-in” means in your mudroom
Two benches can look identical from the front and create different flooring conditions underneath. Ask the cabinetmaker to show the base, support points and every fixing, not just the finished elevation.
- Movable bench on legs: record its loaded weight, foot size and required floor protection. Do not treat “freestanding” as proof that every weight or support arrangement is permitted.
- Floor-supported bench fixed to the wall: tell the flooring supplier that the base rests on the floor and the unit cannot move freely. Wall screws alone do not establish that the floor beneath is unrestrained.
- Bench with a plinth or floor anchors: identify exactly where the base and anchors bear. Those details must be resolved before planks cover the area.
- Wall-supported bench with an open space beneath: have the cabinetmaker verify the structural support. Confirm whether any legs, end panels, trim or other parts contact the flooring. The floating floor is not the bench’s anchoring structure.
This is an information-gathering checklist, not a structural design or an installation approval. Include drawers, stored boots and people using the seat when describing the intended use to the relevant suppliers.
What the manufacturer examples actually say
Karndean rigid core: permanent fixtures first
Karndean’s Rigid Core Plank and Tile installation guide directs installers to put permanent fixtures in place before this flooring and to leave expansion space. It also requires trim to be attached to the wall rather than the floor covering.
For a permanent, floor-supported bench using a product covered by that guide, the starting plan is therefore the fixed fixture first and flooring around it. Confirm that the document applies to your collection and locking system. Do not transfer its dimensions to another brand or product.
TORLYS: a special method is not a general exception
The TORLYS Fix and Float guidelines, revised December 2025, describe a controlled method for certain TORLYS Smart Floors with Uniclic locking. The method has its own movement, adhesive and other product-dependent requirements and supplements the main installation instructions.
Crucially, TORLYS says these guidelines must not be combined with its Cabinet Installation Guidelines without express TORLYS approval. A photograph of a cabinet on a floating floor, or advice mentioning “fix and float,” is therefore not enough to approve your bench. Ask for the applicable cabinet detail and any necessary manufacturer approval for the exact product and layout.
These examples explain why product identification matters. They are not a claim that LV Flooring stocks either brand, and they are not a substitute for the instructions supplied with the floor you select.
Turn the answer into a written bench-and-floor sequence
Once the applicable fixture rule is confirmed, agree on a short drawing and installation sequence that both the cabinetmaker and flooring installer can use. For a product requiring permanent fixtures first, the plan should identify:
- The fixed footprint. Show the plinth, end panels, support legs and anchors that belong to the bench.
- The flooring boundary. Mark where the planks stop around that footprint and label the clearance taken from the applicable guide.
- The finishing detail. Show what conceals the edge, where that trim is attached and how the specified floor movement is maintained.
- The access detail. Identify removable toe-kicks or panels and who will remove them if the joint later needs inspection.
- The final check. Inspect the clearances and fixings before the visible trim hides them.
A sentence such as “leave a gap under the bench” is too vague for this handover. The relevant questions are where the gap is, what sits inside it and whether the finished assembly still provides the specified space.
Check trim, adhesive and wet-boot detailing separately
Do not improvise a glue-down patch under the bench to avoid changing the plan. In the Karndean guide cited above, bonding rigid core to the substrate is generally not permitted; its stated exception concerns residential stairs, not mudroom benches.
Boot storage also raises a separate question about water at the flooring edge. The same guide permits specific flexible sealants in defined potential wet-area circumstances, with limits, and warns against filling expansion gaps generally. Ask for the complete applicable detail rather than treating “silicone around the bench” as a universal solution.
Choose a practical place to remove wet footwear and inspect beneath any removable tray. If water is entering from the exterior door or another building defect, resolve that source rather than expecting a bench trim detail to contain it.
What if the floating vinyl is already installed?
Pause before the bench is anchored. Find the carton label or invoice and photograph the existing floor perimeter. Give the installer the bench drawing, including the proposed fixing locations.
Ask whether the approved solution requires the floor to be lifted or locally removed within the fixed footprint, a different support arrangement, or a product-specific alternative. The answer depends on access, the locking system and the manufacturer’s rules. Do not assume a neat cut around the finished bench will automatically correct an installation that was pinned underneath.
If the product cannot be identified, treat permission to place a fixed unit over it as unresolved. Choosing the bench fixing detail first and searching for a compatible instruction afterward is an avoidable risk.
A useful handover example
Suppose the planned bench has a continuous base on the floor and screws into wall studs. The homeowner calls it a wall-fixed bench, while the flooring installer pictures a wall-hung seat with open space below. A side-view sketch resolves that mismatch immediately: the base still bears on the flooring area.
The next step is to check that arrangement against the selected product’s permanent-fixture rule, not to debate the word “built-in.” This is an illustrative planning example, not a description of an LV Flooring project.
Bring the bench plan when choosing vinyl
For a useful discussion, bring the manufacturer and collection name, the installation guide, a room plan showing connected flooring areas, and the bench drawing with its base and fixing points. Note whether the floor is already installed and who is supplying the cabinetry.
When exploring vinyl flooring at LV Flooring, raise the built-in bench before selecting the installation method. Contact the team with those details so the floor and furniture sequence can be discussed before the work is committed.