How to Layout Herringbone Pattern
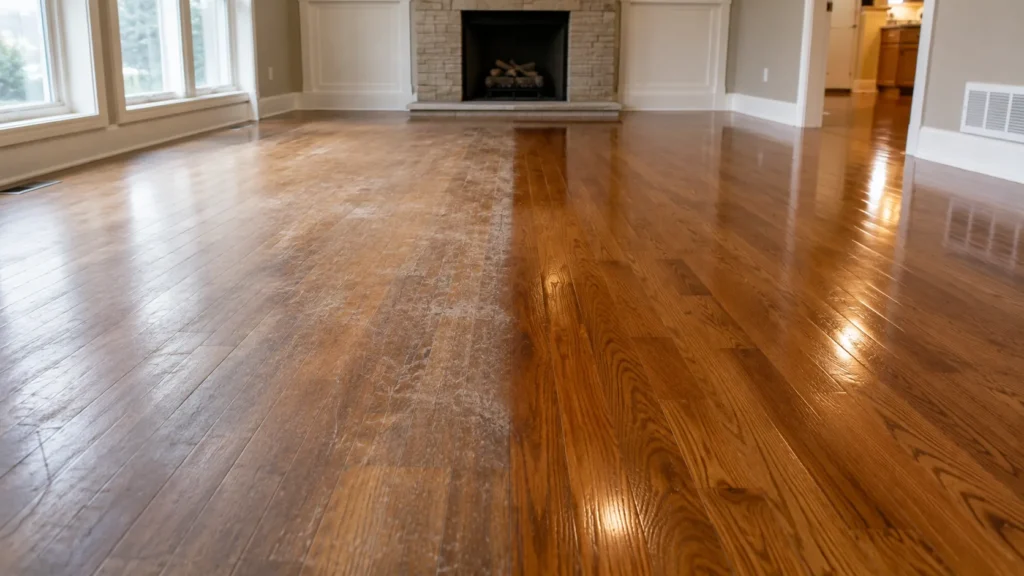
Character, charm, complementary aesthetics, you name it, the Herringbone style flooring embodies it all. So it’s easy to see how and why many people love the Herringbone floor layout and its pattern. It presents a classic flooring design at a budget-friendly price. And if you know how to install herringbone flooring, you can cut down the cost significantly.
The herringbone floor layout provides a perfect blend of utility and beauty. It strikes a balance between two distinct flooring patterns – flooring patterns designed for admiration as art and flooring patterns designed to bear excessive traffic. In other words, this flooring option provides a sturdy yet beautiful solution for your interior designs.
So, if you’re looking to add some personality to your living space without undertaking a significant revamp, try the herringbone floor layout. It may sound like a little tweak initially, but by the time it’s all done, you’ll find yourself standing on a classy work of art. Interestingly, you can also lay the herringbone flooring pattern yourself, and that’s why we provided this guide to help you.
Understanding The Herringbone Layout Pattern
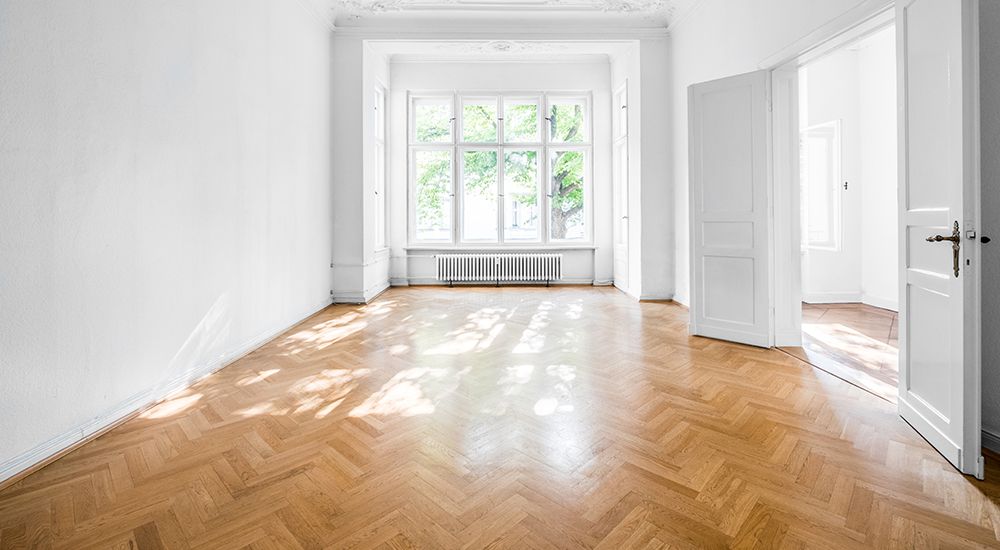
Before you proceed into planning for the project, it’s essential to have some basic understanding of the Herringbone layout pattern. You create a herringbone pattern by placing rectangular wood panels/tiles at a 45-degree angle next to the floor or wall. You then put other tiles/slats together so that the short end of one panel is against the long end of another, forming an L or V shape.
That said, you need to know the difference between a herringbone pattern and a chevron pattern. People tend to confuse these two similar floor designs often. The basic idea behind the two patterns is the same. However, a few points differentiate the two of them.
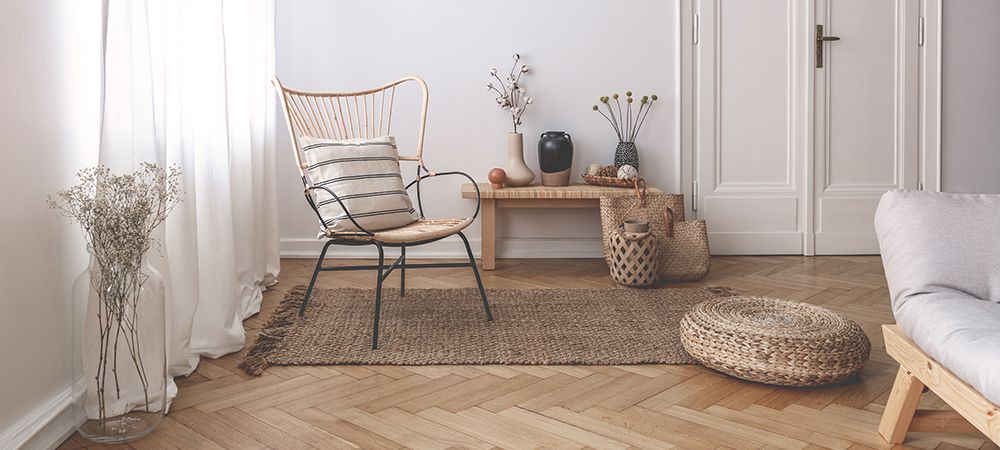
People often associate the herringbone pattern with wood flooring and a classic style. On the other hand, the chevron pattern goes with tiles and exhibits a more modern style.
Not only that, a chevron pattern employs parallelogram-shaped tiles, which are laid end to end to create a zigzag pattern. However, the tiles need to have a standard rectangular shape to make a herringbone pattern. And using rectangular-shaped wood panels/ tiles gives you more options as parallelogram-shaped tiles are harder to find.
Pre Installation Prep
Before you begin to layout the herringbone flooring design, you need to put a couple of things in place. These include the fundamental activities to prepare for the actual project and groundwork.
Ready Your Tools and Supplies
The first thing you need to do is pick out all the tools you’ll need for the project. Preparing the tools beforehand ensures no unnecessary breaks due to lack of equipment as the work progresses. That said, let’s take a quick look at some of the tools and supplies you need to lay out a herringbone pattern in a room.
Tools and Supplies For a Herringbone Floor Layout Project
- Tile: Bucak Lt Walnut H/F 5x20cm, 657571 (see how to find your quantity below)
- Tile Saw
- Grout: Desert Sand, Unsanded
- Epoxy Film Grout Remover
- Flexible Grout Admixture
- Grout Float Tool
- Proflex Thinset (aka mortar)
- Trowel
- Travertine Sealer
- Notched Trowel
- Mortar Mixing Paddle (for use with a power drill)
- Sealer Sponge
- Large Sponge
- Bristle Brush
- 1/16″ Spacers
- Ear Protection
- Eye Protection
- Multi-Tool
- Nail Gun
- 3+ Buckets (one for mortar, grout, and water)
- Caulk
- Touch-Up Paint and Foam Brush
If you have a wood subfloor, you will need to buy and install a concrete backer board before the installation. Regardless, these are the primary items for a herringbone flooring installation using tiles. If you’re using hardwood or any wood, you’ll need the items below.
- Apron flooring strips
- Border flooring strip
- Wood glue
- A spare piece of 3/4-inch plywood
- Tape measure
- Chalk line
- Trammel
- Straight edge
- Framing square
- Miter saw
- rubber mallet
- Router and one 1/4-inch flooring bit
- Rafter square
- Drill/driver
- Flooring nailer
- Circular saw
- Screws
- Flooring splines
- Flooring nails
- Painter’s tape
Pick the Appropriate Flooring Material
There are three main materials you can use to layout a herringbone pattern flooring. You can either go for a hardwood finish, a prefinished engineered hardwood, or ceramic tiles. Prefinished engineered hardwood flooring is an excellent choice if you’re unsure of the best material. It’s the easiest to work with of all the options available, looks great, and requires no additional finishes or stains.
Hardwood flooring is also a good option as it adds a high-quality sheen to the room and complements the existing interior design. It’s also quite durable, and its aesthetic value speaks for itself.
Ceramic and marble floor tiles are the most typical materials for herringbone floor patterns. But that doesn’t necessarily mean they offer the easiest installation routes. You’re going to need more materials and expend more resources when using ceramics or marble tiles.
Regardless of the material you pick, make sure you order a little more than you need. That way, you’ll have some extra floor panels at hand if there’s a mistake during the installation.
Calculate How Many Tiles You Need
To figure out the right amount of tiles required, get an accurate measurement of the room in square footage ( length by width). Before getting the materials you’ll use, you should first have a good idea of the total number which will be sufficient for the project. Then, add 10% to the number and round up the value to the next full box size. That’s how many boxes of tiles you need.
This formula accounts for mistakes, breakages, and cuts. So, you don’t need to purchase any more tiles than the value you get using the formula.
Prepare the Subfloor
Before laying the flooring materials, you need to prepare the area. Particularly, you want to make sure the sub-floor can handle whatever load you place on it. You also want to make sure it’s completely level, as an uneven subfloor may cause problems when you begin the project.
Installing the Herringbone Floor Layout
The two common materials people go for when installing Herringbone floors are ceramic tiles and hardwood panels. As such, we’ll be discussing the process for installing a herringbone floor style using both materials below.
Cut the Planks into Rectangular Strips
There are flooring planks predesigned for herringbone flooring, but if you’re not working with those, you’ll have to manually cut your tiles into shape. Even if you’re working with pre designed tiles, you’ll still have to do some cutting at some point. The need for cutting is why you should have a tile saw at hand before you begin work.
When cutting your tiles, the 2-by-6 inch subway is the standard size for each strip. You can opt for longer strips as they often make the room look more elegant. However, they may be more challenging to work with. Also, it’s better to cut as you install. Cutting before the installation can lead to the wastage of many good planks.
Mix Up and Lay Down the Thin Set
The thin-set (mortar) serves as the glue which will hold the tiles firmly to the sub-floor. To mix the thin-set, add water to the mortar and stir until you have a toothpaste-like consistency. We advise against stirring the mixture by hand; instead, attach a mixing paddle to a drill and work it like a batter mix. Once you have your thin-set, your method of laying out the mixture will depend on how you intend to install the tiles.
Lay Out The Flooring Planks
You can take two approaches to lay out the tiles in a herringbone pattern. The first option involves spreading the thin-set directly onto the concrete and then placing the tile. Using this method, you want to create grooves in the thin-set with a notched trowel. The grooves prevent the thin-set from expanding too much when you place the tiles in it.
The other method involves splashing the thin-set on individual tiles and fixing them to the concrete. You back-butter each tile with the thin-set just like you’ll spread peanut butter jelly on a slice of bread. After applying the thin-set to the tiles, use the notched trowel to create grooves in the thin-set before placing the tile on the concrete.
The second approach takes a little more effort than the first; however, it’s the most effective for conserving resources. It also reduces mistakes, and whenever errors happen, it is often easier to correct them. Then again, you won’t have to deal with the mess of dried mortar either. Therefore, this approach allows you to work at your pace.
Laying out the Herringbone Pattern
The whole point of this post is to get you to know how to layout the herringbone pattern properly, and this is where you do it. When laying out the herringbone floor layout, the trick is in how you align the tiles or the floor panels. Consider the following steps.
- First of all, you want to draw out a centerline or focal point to align the tiles’ edges.
- After establishing the centerline, align the tiles at 45-degree angles to the line such that the short side of tile A is lying perpendicularly on the end of the long side of tile B. Ordinarily, this should form an L shape. But by ensuring the corner point of tile B is directly on the centerline at an angle of 45-degrees, the combination will create a V shape. Please note that the angle does not necessarily have to be at 45-degrees. We’re only stating an angle of 45 degrees as the ideal angle.
- Aligning the tiles using the centerline creates a V-shape with the point of the V on the centerline. Continue this process down the centerline to make a full herringbone pattern.
Don’t forget to use spacers between the edges of your tiles as you lay them. This creates space for the grout and allows you to remove extra thin-set, which may ooze out between the tiles.
Cut and Finish the Edges.
After laying the tiles through the room, you’ll need to cut several smaller 45-degree tiles to fill in the spaces left. Of course, you can’t just cut shapes arbitrarily; you’ll need to measure the holes to get the right tile size. Nonetheless, this process should be straightforward.
Grout the Floor
After you lay out the herringbone pattern, let the plank set entirely before proceeding to the next step. Once you’re sure the plank has acclimatized, mix the grout and apply it to the spaces in between the tiles. Ensure to fill up every space with the grout. Of course, you’ll need to remove the spacers between the tiles before applying the grout.
De-haze and Seal the Floor
Wait for a while to let the grout dry up before cleaning up the floor using a film remover. This process is called de-hazing. Use a brush to scrub spilled thin-set and grout off the floor planks, then wipe it clean with paper towels.
Wait for another 72 hours before sealing the floor. You can either use a sealer sponge or travertine for this process. If you’re using a sponge, soak the sponge in the sealer liquid for about 10 minutes before rubbing it across the tiles. And that’s how to lay a herringbone flooring using tiles.
Related Article: Is Herringbone Flooring Popular
Installing Herringbone with Hardwood Flooring Material
The process to lay out a herringbone pattern using hardwood material is similar to concrete tiles. However, the process for preparing the slats is very different. Consider the following tips for laying herringbone flooring using wood slats.
Find the Room Center and Establish the Field
This is an essential part of the job, and it requires a great deal of attention to detail:
- Identify the center of the room and establish the rectangular field the pattern will occupy.
- Draw a chalk line across the center of the room, then use a trammel to mark a perpendicular line off the centerline.
- You can establish the rectangular field using the perpendicular lines as starting points.
Trim Down and Add Grooves to the Slats
The trimming process is very similar to how you’ll cut ceramic tiles into shape. First, you need to determine the optimal slat size for the design and trim the panels to that size. The only difference here is that you may require rafter squares to increase the cutting accuracy. Also, don’t forget to trim the tongues on the sides of the slat to obtain the correct width.
After getting the optimum size in terms of length and width:
- Add grooves to each slat so they’ll fit together seamlessly.
- Set your router to match the existing groove on a slat you didn’t trim when creating the grooves.
- Make sure the slats will fit together correctly before laying down the panels.
Create and Set the Nailing Blank.
The nailing blank will be your template as you lay out the herringbone pattern. To do this, cut a piece of ¾ inch plywood into the shape of an isosceles or equilateral triangle. You should make sure the length of the two sloping sides matches the exact length of the slats you prepared.
Draw a line across the middle of the nailing blank and set down the blank. Ensure the middle line aligns with the centerline on the floor. Screw the nailing blank into the subfloor and create grooves on the sides of the nailing blank with the router.
Lay Out the Slats in the Herringbone Pattern
Once you have the nailing blank down, you can lay the slats along its side to create the V shape typical of the Herringbone floor pattern. Place the first slat to line up perfectly with the nailing blank. Then place the second such that while it’s also perfectly lined up with the nailing blank, it overlaps the end of the first panel. Finally, secure the slats to the floor by placing nails every few inches along the slats.
Add subsequent slats until you get to the end of the floor. Then remove the nailing blank and place it upside down such that the flat side now faces the opposite border of where you started. Make sure it also fits neatly into the tongue of the last slat you installed before screwing it back into the subfloor. Then begin placing slates along the sides until you complete another section. Repeat this process for the entire room.
Fill Empty Slots and Add Borders
While using the nailing blanks, you’ll unintentionally leave a few empty triangle areas as you proceed. Cut up a few triangle-shaped slats and use wood glue to fit the triangular pieces in the empty spaces.
After laying the slats all over the room, you want to add borders around the entire layout. First, use the router to cut grooves in the slats you have on the floor. Then use wood glue to attach flooring splines inside the grooves. You can then place a decorative strip around the flooring to the wall. Filling up the space to the wall is the last step to installing your herringbone floor layout.
Related Article: How Much Does it Cost To Install Herringbone Wood Floors?
Final Thoughts
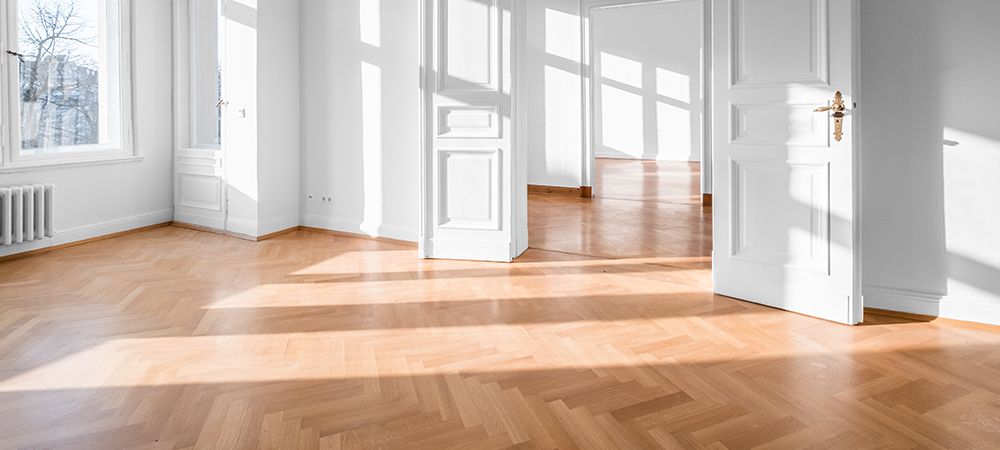
After installing the herringbone pattern layout, you can take a step back and admire your work. It’s not an easy feat, but we believe you can pull it off. We just described to you the best way to layout herringbone flooring; try not to cut corners, and you’ll get it right.
Nonetheless, nothing beats a professional job. So, if you need a company to help you install a herringbone pattern flooring in your apartment, we’re one call away. Or you can check out our online store for herringbone flooring designs. We only offer the best at LV Flooring. Look through our online collections today!