How to Install a Herringbone Floor

Herringbone flooring installation can be complicated, especially if you’re doing it without tips from the experts. To install herringbone floors, you’ll need the right set of tips in addition to an array of tools.
For instance, herringbone floors require accurate calculation, significantly when cutting the boards. Also, using the wrong materials can change the results of your installation.
The best way to install a herringbone floor is to allow your boards to acclimatize. It’s common to find hardwood floors wrapping or contracting after their installation. Hence, you must give the boards about 48 hours to get used to the room’s temperature. The 48-hour time gap will ensure you get the best out of your herringbone floor.
Here we’ll provide a detailed guide to installing herringbone flooring. In a step-by-step format, we’ll discuss how to install herringbone flooring. Also, due to the complexity of the procedure, we’ll end this blog by providing herringbone flooring safety tips.
How to Prepare For Herringbone Floor Installation
The installation process doesn’t start from fitting the hardwood. Instead, you must make preparations to ensure you get the best results. What herringbone pre-installation prep does is to ready the place where you’ll be laying the flooring.
The pre-installation prep involves choosing the type of herringbone flooring and tools for the installation. Here’s what you’ll need to do:
Choosing the flooring material
The first and probably the most crucial decision you need to make is the type of herringbone floor. Choosing the best herringbone floor depends on the installation area. When it comes to herringbone flooring material, you can either go with engineered hardwood and solid hardwood herringbone floors.
Engineered hardwood is prefinished wood. That is, there’ll be no need to add a finish or stain layer after the installation. It is also easier to install engineered hardwood compared to other types of hardwood.
While buying your preferred herringbone floor hardwood, buy extra wood. The extra flooring will serve as a backup in case of miscalculation. It’ll also come in handy if there’s unexpected damage to any of the boards.
Gather the necessary tools
To effectively install a herringbone floor, you must ensure you give adequate attention to the procedure. You can achieve this when you have all the tools available. Failure to do this may result in distractions and consequently result in an installation error.
To install a herringbone floor, you need several tools. Each of the tools serves different functions at different stages of the installation.
- Flooring material (Hardwood or Engineered hardwood)
- Circular saw
- Wood glue
- Tape measure
- Rubber mallet
- Nails or screws
- Chalk line
- Router
- Painter’s tape
- Plywood
- Flooring nailer
- Flooring splines
- Flooring strip (Both border and apron)
Preparation of the subfloor
Preparing the subfloor is an essential first step in the installation of any herringbone floor. The subfloor must be in good condition to support a long-lasting herringbone floor.
You must ensure the subfloor is level. A level subfloor will aid the even arrangement of the flooring material as well. Next, check the moisture level of the subfloor. The moisture concentration should be considerably low and not higher than 5%.
Your subfloor can either be timber or concrete. Typically, installing an engineered hardwood herringbone floor requires you to use the glue-down method.
Here are the different types of subfloor you can use when installing a herringbone floor.
Timber sub-floor
You may need to use a timber sub-floor if the area already has a floorboard. If the floorboards are not in good condition, you may need to replace the floorboards.
The replacements should be thick and sturdy plywoods. Plywoods offer you a good and stable base that you need for fitting your engineered hardwood herringbone floor.
Concrete subfloor
If your existing subfloor is concrete, the floor must be free of bitumen residue or adhesive. If your concrete subfloor requires further levelling, you can use a compound for self-levelling.
When using the self-levelling compound, ensure that the base’s moisture content isn’t more than 35% R.H. If you’re unsure of the moisture content, you can use a Liquid Damp Proof Membrane (LDMP). It helps to prevent excess moisture in the subfloor. Also, LDMP strengthens the new herringbone floor along with the subfloor.
On the flip side, if the subfloor is a relatively new screed, you should equally check the moisture content. Typically, a basic screed may take several months before it gets dry.
Methods of Installing Herringbone Floor

To install herringbone floors, you have to use the best installation method. Your choice of method should be dependent on the type of herringbone floor.
For instance, the click method is best for people doing the installation themselves. Here are the various techniques used to install herringbone floor.
The click method
This method of herringbone flooring installation makes use of neither nails nor screws. The click method works by fitting planks in a jigsaw pattern.
The click method is gradually becoming the go-to DIY installation method for herringbone floors. The reason is that it’s simple and straightforward to apply.
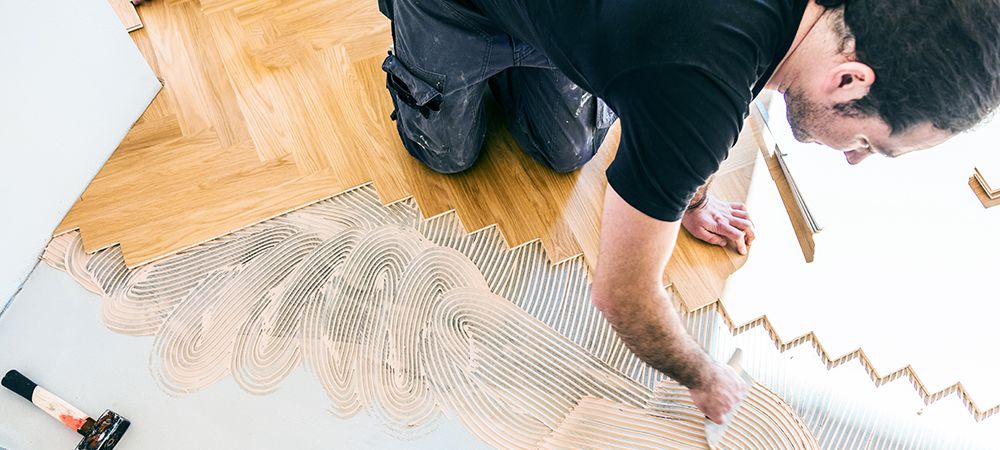
The glue-down method
The glue-down method requires more technical skills. Firstly, the choice of glue must be compatible with both the floor and the wood. The wrong glue can crack and damage the hardwood.
Checking the moisture of the subfloor is also vital before glue application. Moisture levels are essential, especially when your subfloor is a concrete floor.
The moisture level of the floor should hover below 9% at the time of applying the glue. If it is higher than 9%, you may need to use a moisture barrier or wait till the moisture level reduces.
Ensuring your floor is smooth, dry, and has no structural defect is another essential precaution. If you overlook this precaution, dampness may arise and result in swelling of the floor.
Additionally, the thickness of the glue on the surface must be mild. Thick glue may result in uneven distribution of pressure across the board.
The Nailing method
Choosing to install a herringbone floor using the nailing method depends on the subfloor. The subfloor compatible with the nailing method of herringbone installation is either a plywood or battens subfloor.
Where the subfloor is concrete, you can lay a 4mm plywood before the hardwood installation. It’s also advisable to use a foam underlay to avoid squeaking noise.
When the battens are your choice of subfloor, use a damp-proof material. Also, the depth density of the batten must not be less than 50mm. This aids the strength of the batten while nailing the floor.
During the nailing method, use a nail gun to push in the nail. The nailing should happen at an angle of 45 degrees to the board’s center. Properly adjust the nail gun to allow the nails to drive in at a consistent pace. Any mistake can result in damage to both the hardwood and the subfloor.
The screwing method
Another way to install a herringbone floor is the screwing method. It’s a method that can perfectly work with either joist, battens, plywood, and floorboard. The screwing method is similar to the nailing method, but it uses screws instead of nails.
Drive the screws into the center of the board at an angle of 30 or 40 degrees. Then fit the boards together firmly after tightening the screw. The result is a firm and tightened herringbone floor.
Related Article: How Much Does Herringbone Hardwood Flooring Cost?
Steps to Install a Herringbone Floor
After preparing your subfloor, the next thing to do is install the herringbone floor. It may prove tedious due to the level of technicality. Nonetheless, adequate attention to detail will result in a good job done. Below are the steps to install a herringbone floor.
Step 1: Measuring and marking the centreline, the floor, and the working distance
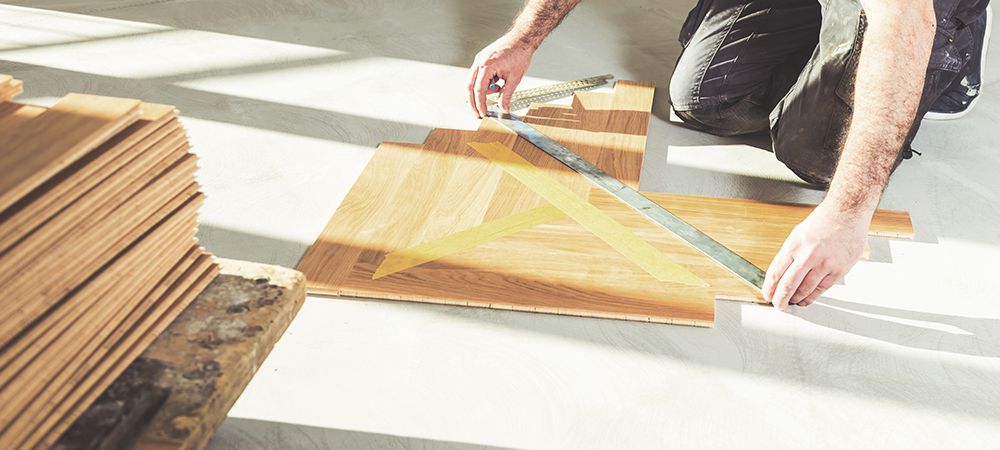
The first thing to do is to measure your working area. Using the measurements, mark out the centreline of the floor and draw two intersecting arcs at the point. Then, you’ll need to draw out a parallel working line.
The parallel working line will indicate the working area which the hardwood installation will cover. Additionally, it also helps you maintain a neat and perfect installation.
Step 2: Measure and cut the slats
To properly install a herringbone floor, pay attention while measuring your slats. Inaccurate measurements can result in a disorganized arrangement of the floor. While cutting out the slats, ensure you measure the length as a multiple of the width. Also, all of the slats must maintain the same length and width.
After ensuring the slats are all of the same lengths, you can cut out the slats necessary for the installation. While cutting the slats out, cut the tongue at each end of the slat.
Step 3: Add grooves to both ends of the slats
To ensure proper interlock of the herringbone slats, a groove at the ends will prove helpful. The groove will help in setting the depth of the router bit. Test and route the cut end of each slat to see if it works with another. Do this test phase for all of the slats.
Step 4: Installing the nailing plank
The next thing to do is cut out and install the nailing plank. The nailing plank is a triangular board cut out using a circular saw. The triangular block serves as the starting point in your attempt to install a herringbone floor.
The centreline of the nailing plank must align with that of the subfloor. Then, fasten it to the floor using a screw and a screwdriver. Add groove to the nailing plank’s forward edges.
Step 5: Establish the slat pattern and follow the sequence
The next step when installing a herringbone floor is to add the first slat to the plank edge. Add a slate to both plank edges with both tongues facing out.
The two slats must overlap each other at the top of the triangular nailing plank. Use a flooring nailer to fasten the tongue edge of each slat to the subfloor.
After ensuring individual slat alignment, nail the planks. Follow this course and position each slat to align with the previous one. Only nail the slats when they align with overlapping slats. You can then attach a feature strip after laying both course slats.
Step 6: Mark out the overlaps at the end of the course
To install a herringbone floor neatly over a surface, you need good finishing. The proper finishing is to mark out the overlaps of the slats joining points. Apply tape on the marked-out overlaps to ensure straight cutting and to guard against splintering.
After the tape application, you can use a circular saw to cut the overlap down across the tape neatly. Remember to add a groove to the cut edges to aid the use of flooring strips for the correct framing.
Additionally, if you’re using the glue-down method, make sure you don’t step on the boards. Wait until the freshly installed herringbone flooring dries before stepping on it. You can slip and sustain injuries if you step on a board that’s yet to dry. Also, you can scatter the flooring boards.
To secure herringbone flooring, use pins or small nails. This works best if the subfloor is made from timber. If you get to a wall and an entire board can’t fit in, wait till the adhesive is completely dry. After the adhesive drys, you can cut appropriate sizes that fit into the small spaces.
Safety Tips For Installing Herringbone Flooring
Professional herringbone installation services can save you the stress of doing it yourself. Without the right experience, you may sustain injuries while using the installation tools.
If you’re unfamiliar with using a nail gun, you’ll likely nail down the planks wrongly. To install a herringbone floor safely, follow these precautions. They are
- Avoid water and dust in the room while the herringbone installation is ongoing. To do this, you may need to make use of a doormat at the entrance of the room
- Ensure you sweep and properly vacuum the room before and after the herringbone floor installation
- When there is a need to remove stain from the herringbone floors, use a soft cloth or mop
- Ensure you use masks or respirators when cutting or sanding the hardwood floor
- Use ears and eyes protection while handling the table saw
- Follow manufacturer guidelines when using any heavy machine like a table saw or nail gun
- Ensure you unplug any electrical machine that’s not in use
- When it comes in contact with a spark, wood dust can cause a massive fire. Always be careful on the job site
- Vacuum wood dust immediately after sanding or cutting the wood. Empty the content far away from the job site
- Have a fire extinguisher close by in case of a fire outbreak
- Wear safety gloves and boots to prevent any injuries while working
The average herringbone floor installation involves the use of an adhesive, varnish and a sanding sealer. You must handle these three products well. Improper handling can cause,
- A fire accident
- Dermatitis or sensitization if they come in contact with the skin
- Chronic and acute health issues if you inhale them for a long period
Related Article: What’s The Difference Between Chevron And Herringbone Floors?
To Wrap It Up
Herringbone flooring gives your space a beautiful and unique appearance. Ideal for both the home and the office, herringbone floors are durable and easy to maintain.
Knowing how to install herringbone flooring can save you money if you prefer the DIY method. With the herringbone installation tips in this article, you can install a herringbone floor seamlessly.
Installing herringbone flooring requires that you pay close attention to the small details. An inexperienced installer can waste flooring boards and even increase the installation time.
To save yourself time, hire the best contractors to install herringbone flooring in your home. With LV Flooring, you’ll get smooth, speedy and professional flooring installation. Talk to any one of our experts today!